Before making the WooCom Made Easy operational, login into Salesforce AppExchange.
Active Salesforce Org
WooCommerce Storefront
Order Object enabled on Salesforce org.
Installation
If you want a smooth installation process without any errors or glitches, have a look at the process mentioned in the following sections of this manual.
Installation Setup At the Salesforce Platform
Login into “Salesforce.com” to begin the installation process. Here the app is installed and configured for functionality.
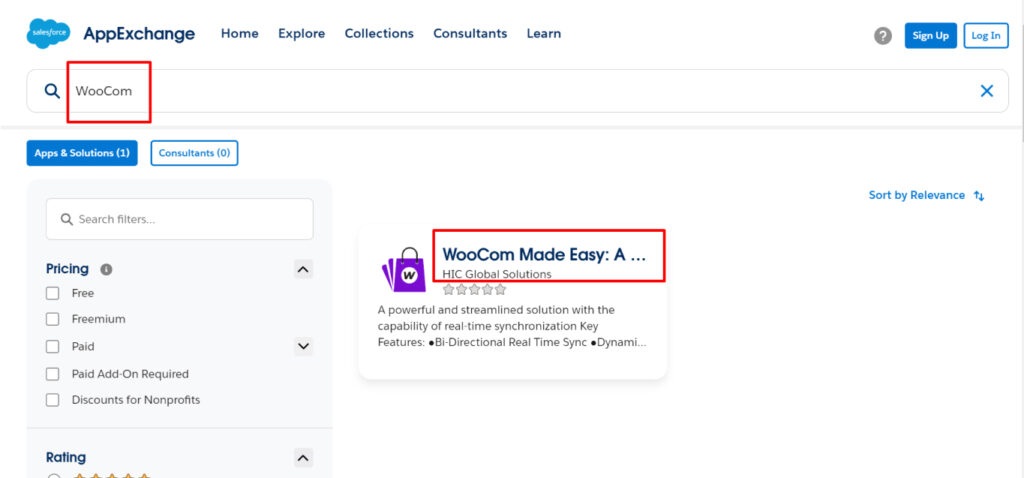
Step 1 : Go to Salesforce AppExchange and type “WooCom Made Easy” in the search bar.
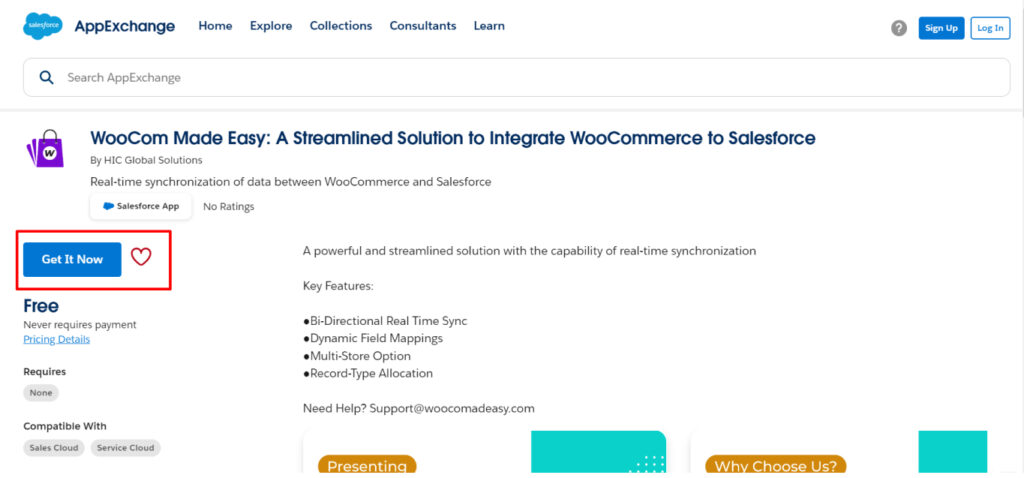
Step 2: After selecting the app, tap on “Get It Now” to download the app.
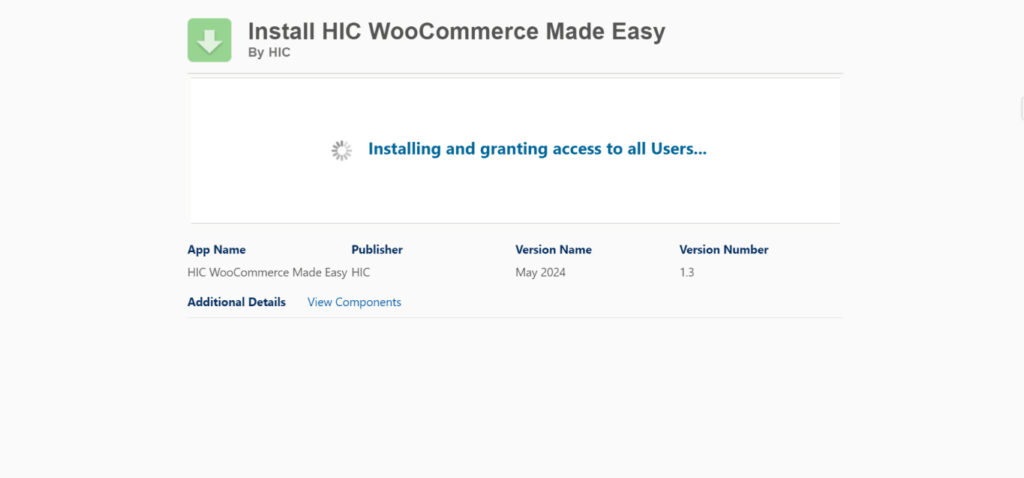
Step 3: Now, pick the profile for which you want to install the app and click on the Install Button.
Step 4: Your app is all set to get installed in your Org.
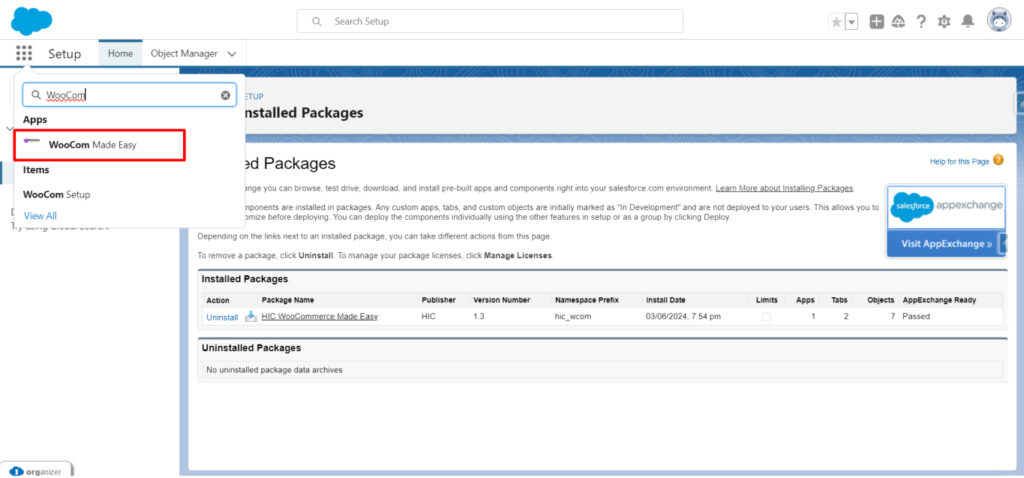
Step 5: Once the installation is done, you will find the WooCom Made Easy app in your org.
Please Note : You must log in to Trailblazer.me with your Salesforce account credentials to download the WooCom Made Easy app.
Prerequisites Before Connecting the WooCommerce Store
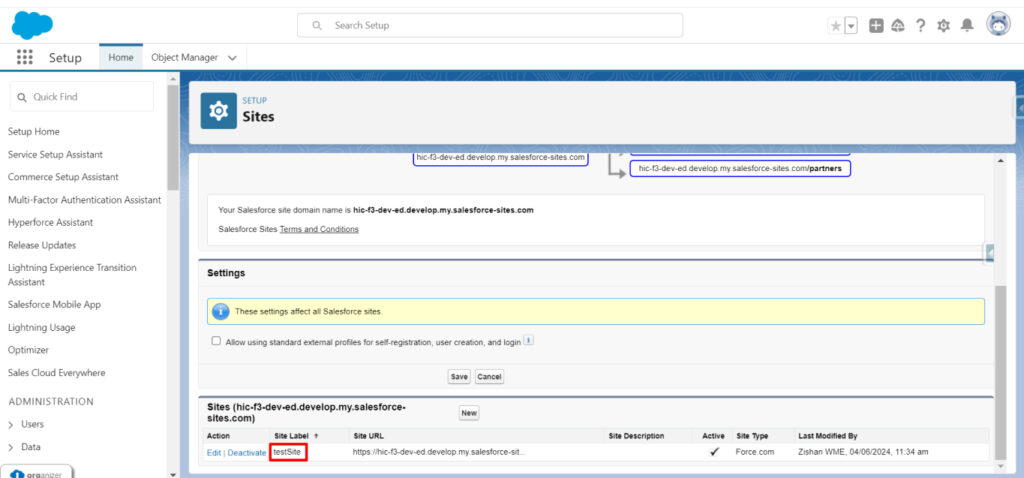
Step 6 : Initially, there will be no active site in your Org. when you open the WooCom Made Easy app. Click on the mentioned link that will redirect you to the site from where you can activate the site.
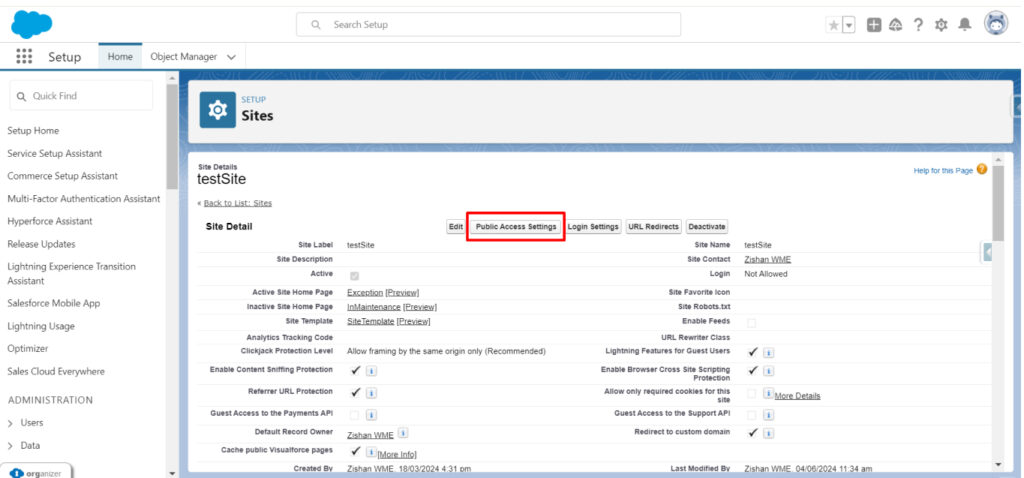
Step 7: Once the site is activated, you need to click on the site label and Public Access Settings.
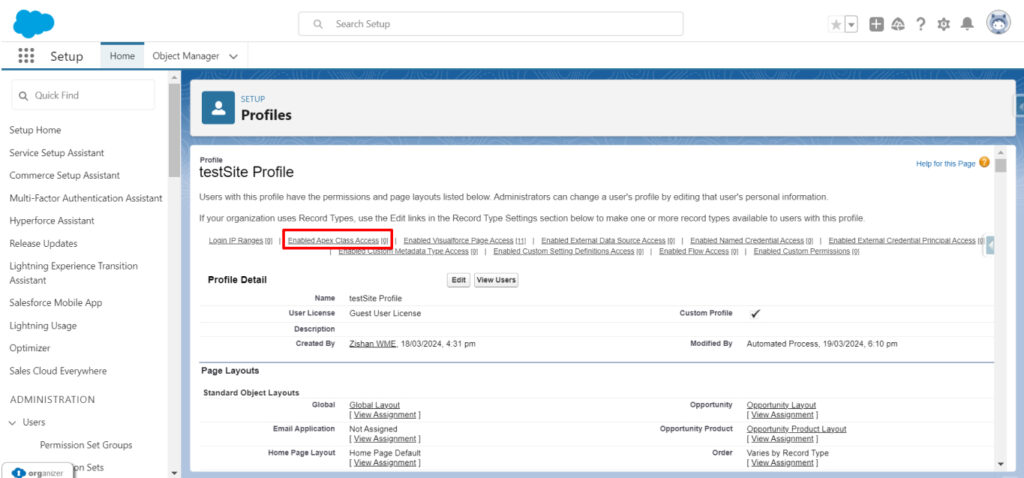
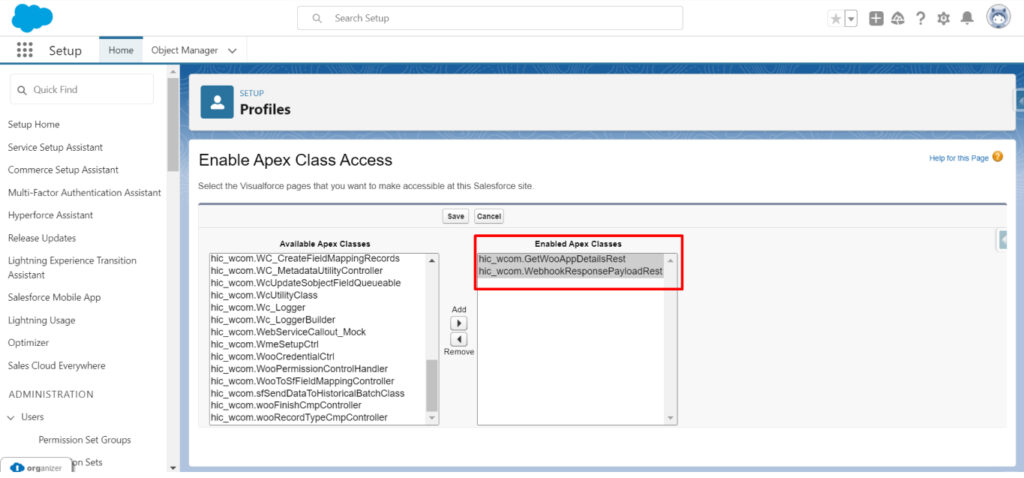
Step 8: Now click on Enabled Apex Class Access.
Step 9: Now Select “hic_wcom.GetWooAppDetailsRes” and “hic_wcom.WebhookResponsePayloadRest” Classes and save.
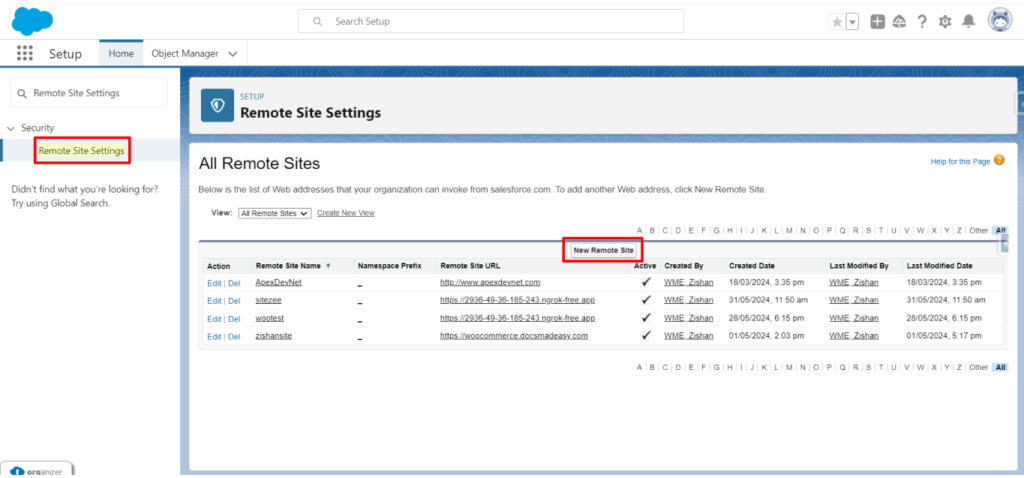
Step 10: Now search for Remote Site Settings from Setup and create a new Remote Site.
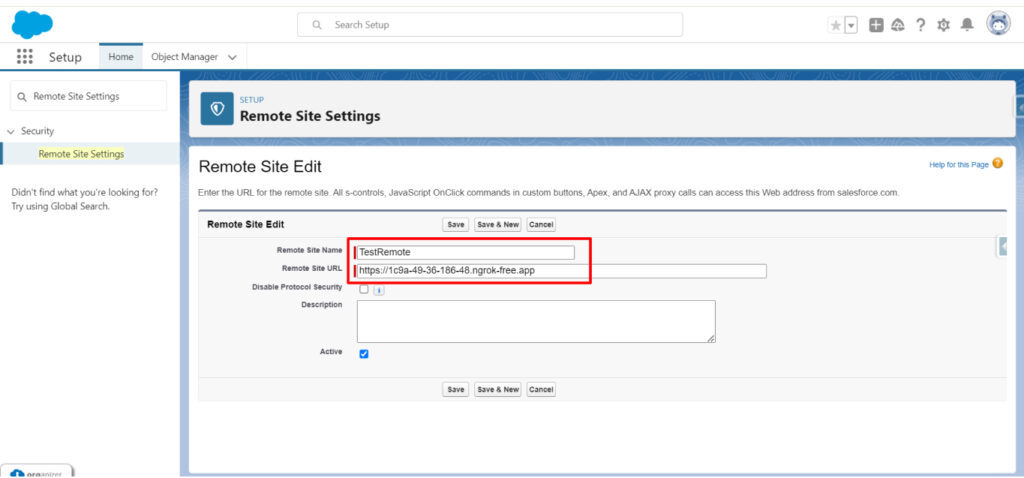
Step 11: Give your Remote Site and Name, enter your store URL in the Remote Site URL option, and save.
Connecting WooCommerce Store
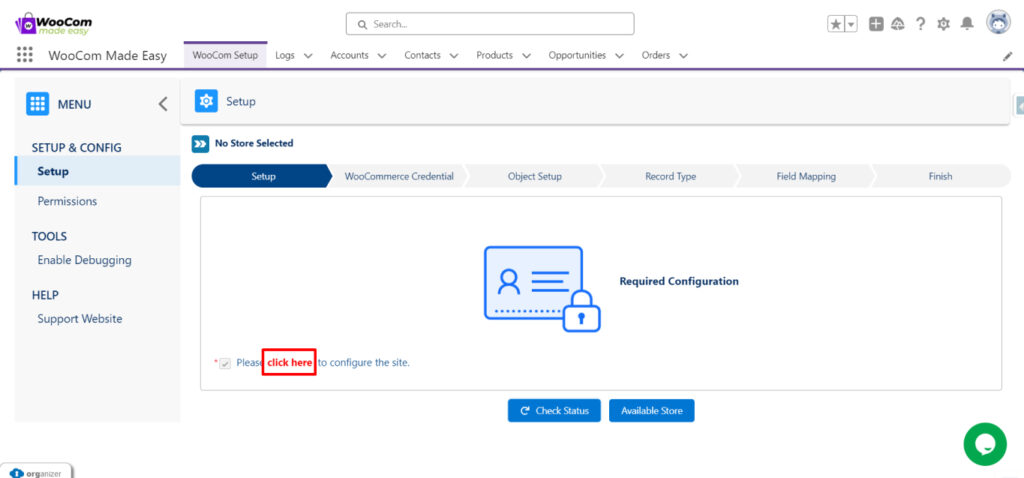
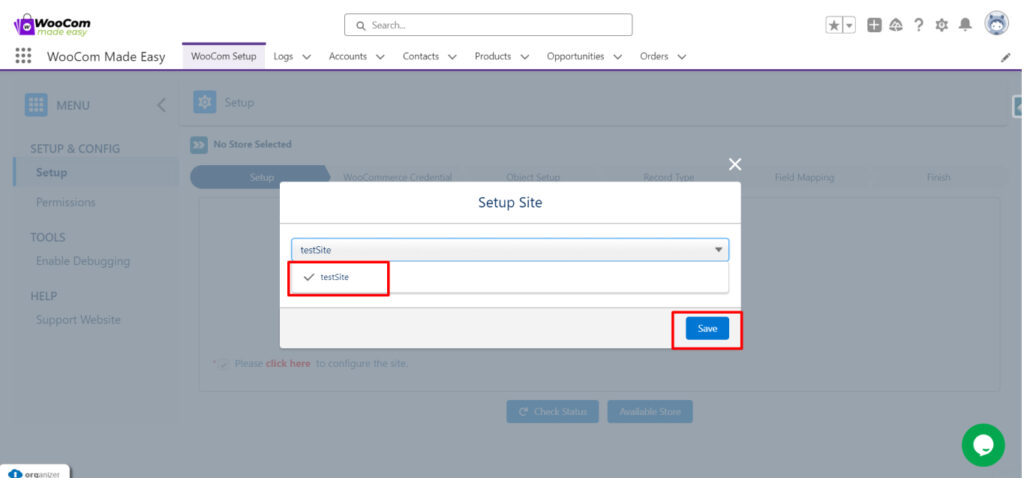
Step 12 : After completing all the prerequisites, visit the WooCom Setup page and click on the link to configure the site.
Step 13: Click on the dropdown to select your site and save.
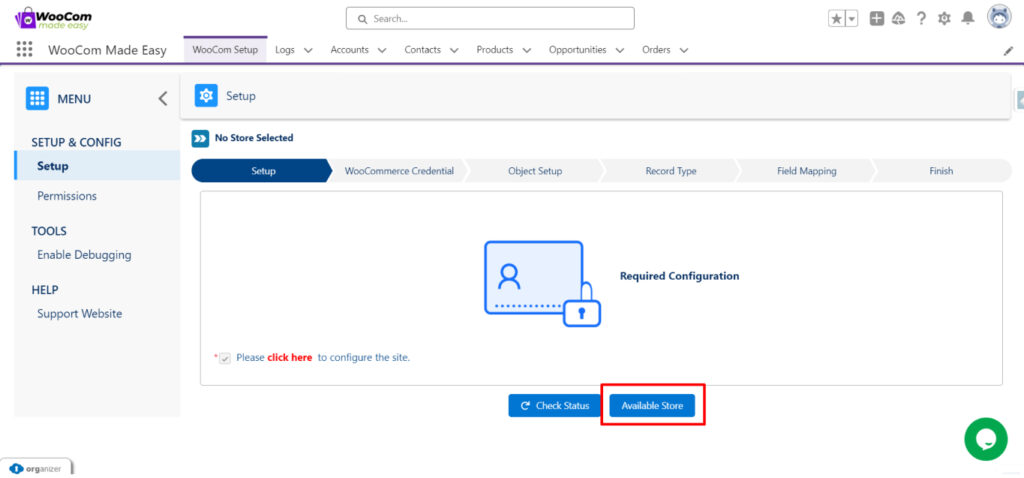
Step 14: Click on the “Available Store” button to connect your WooCommerce store.
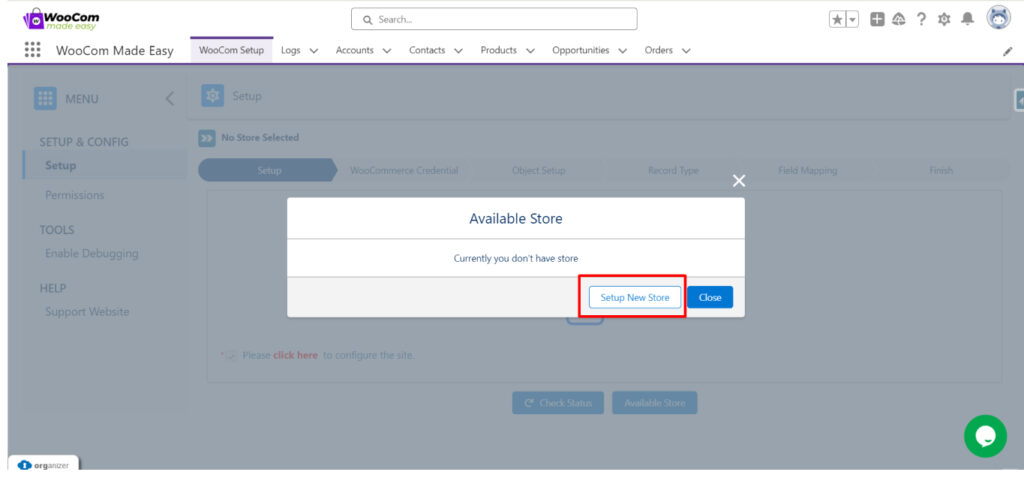
Step 15: Tap on “Setup New Store.”
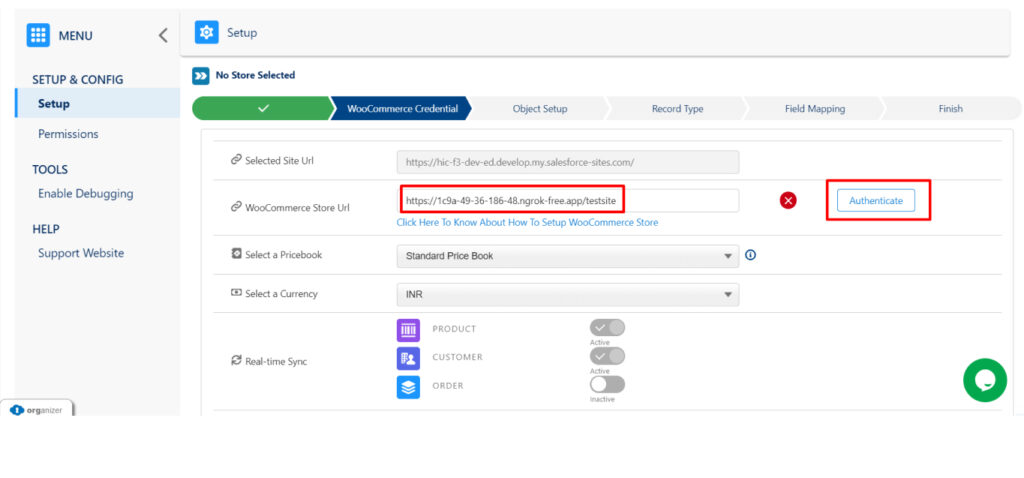
Step 16: Enter the URL of your WooCommerce Store followed by your store’s name in the “WooCommerce Store URL” field, and press “Authenticate Button.”
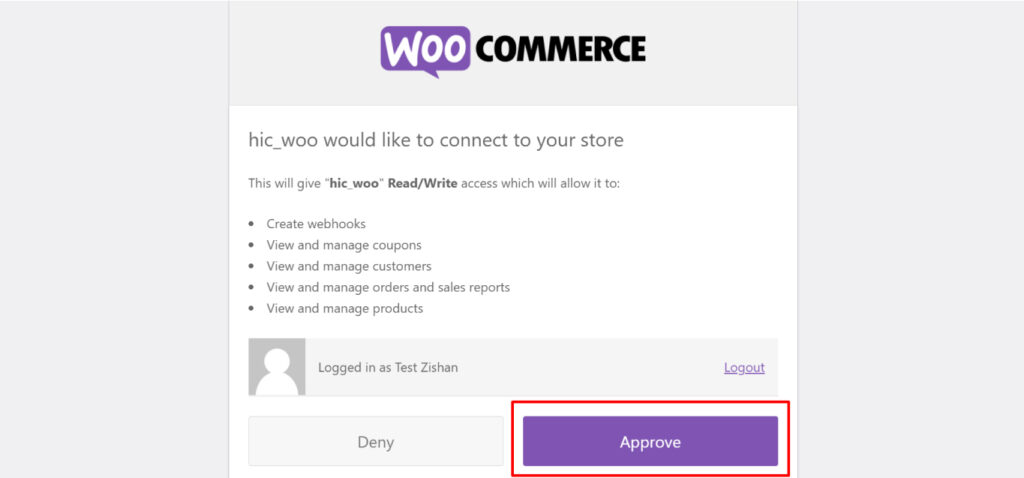
Step 17: Now, click on the “Approve” button to connect your store.
Store Configuration
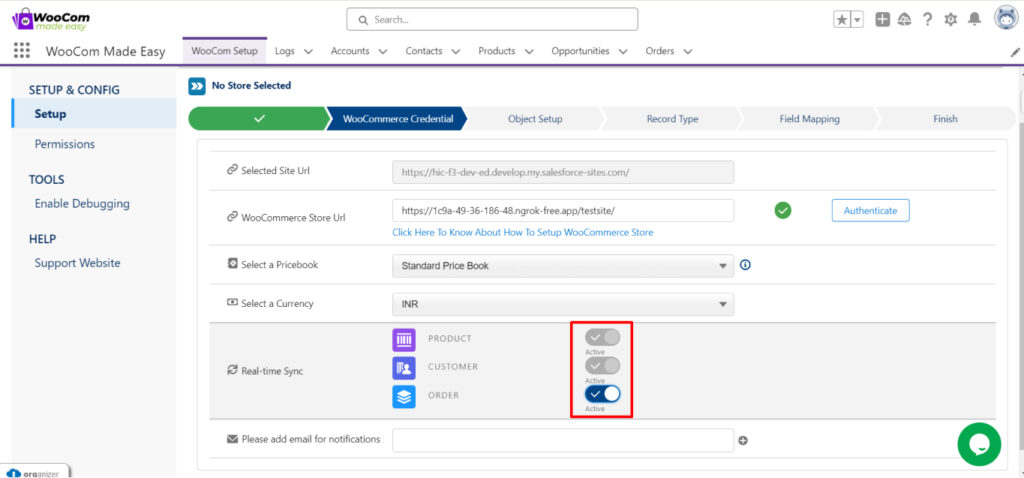
Step 18: After successfully connecting your WooCommerce Store to the Salesforce org, you can select PriceBooks, Currency, and Objects to do real-time synchronization.
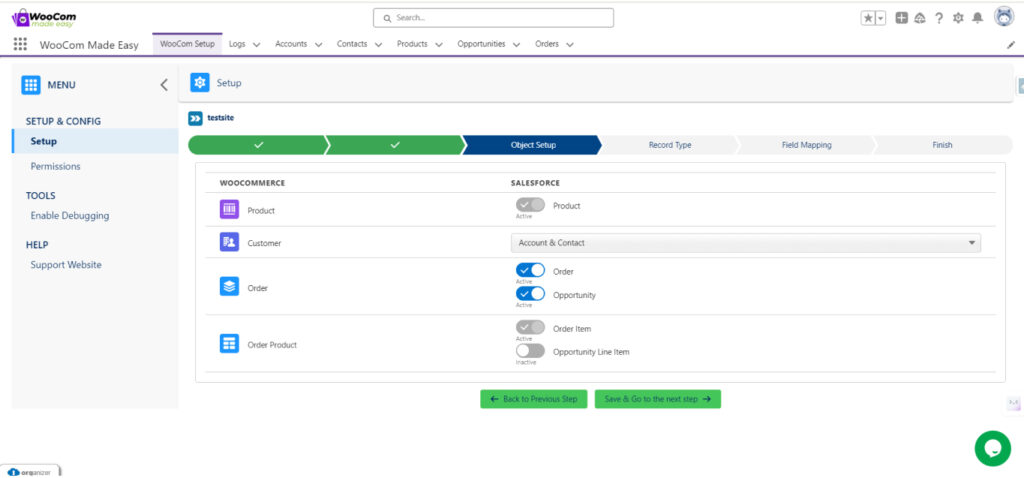
Step 19: After selecting your preferences, the next step is Object Setup from where you can select objects by pressing toggle buttons and dropdown (for customers).
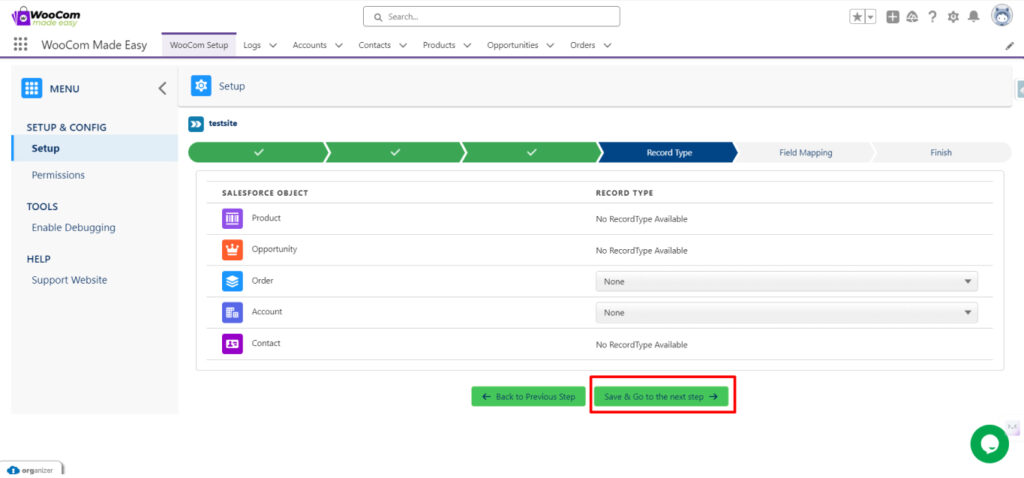
Step 20: On the next page you can choose Record types for the Salesforce objects as per your preference.
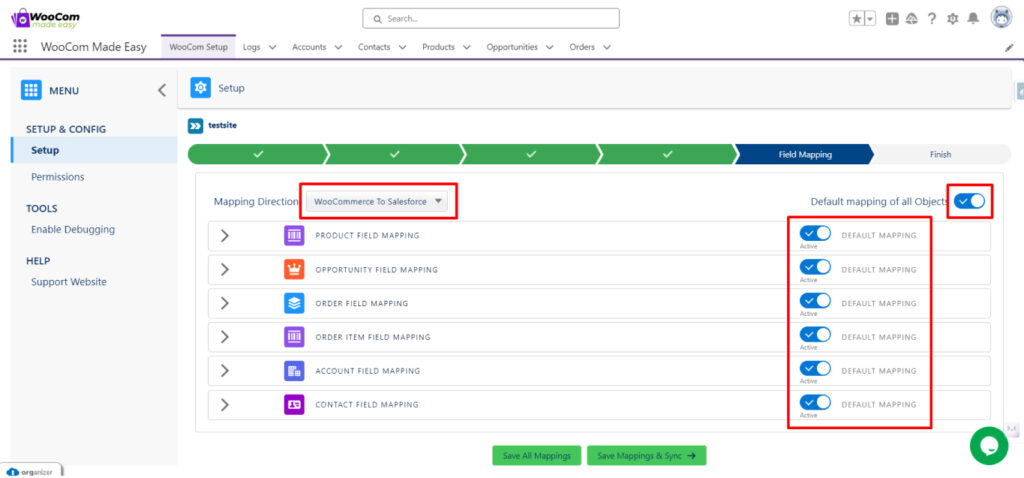
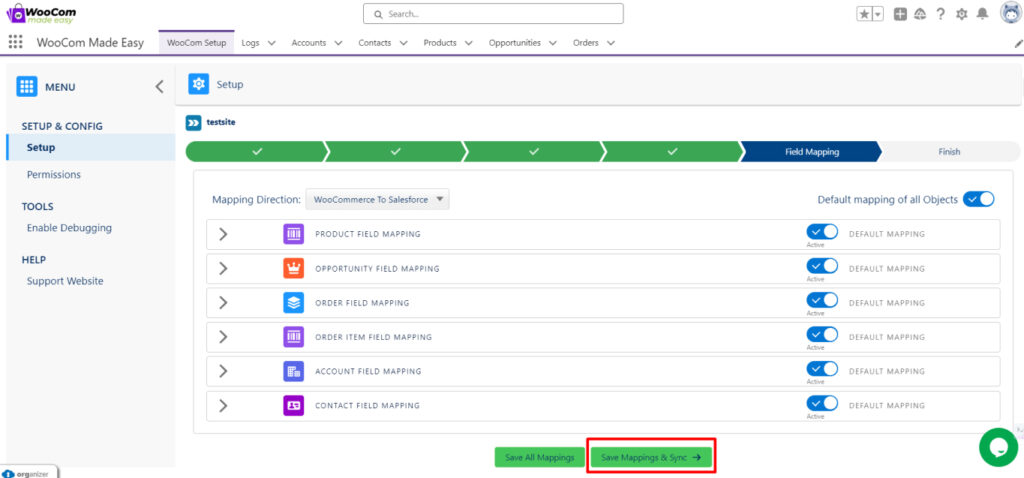
Step 21: In the Field Mapping Page you can choose Between Default or Custom Field Mappings. You can also choose between WooCommerce to Salesforce Mappings and vice-versa through the dropdown present at the top.
Historic Sync
Step 22: To sync your Historical data, click on the Save Mappings and Sync button.
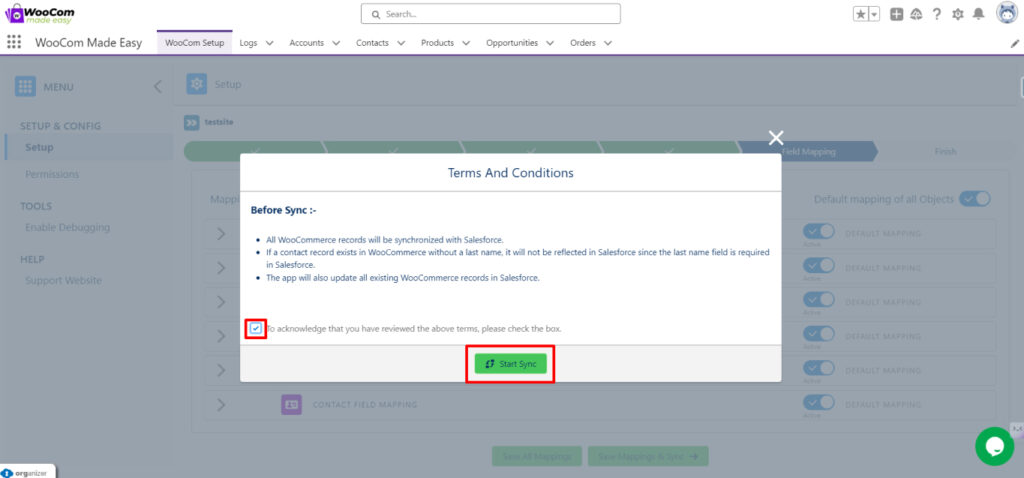
Step 23: By agreeing to the terms and conditions you can begin with the Sync Process by pressing the “Start Sync Button.”
Step 24: Once the Sync Process is completed, all your WooCommerce Store data will be migrated to your salesforce org. 👇
WooCommerce to Salesforce Real-time Sync
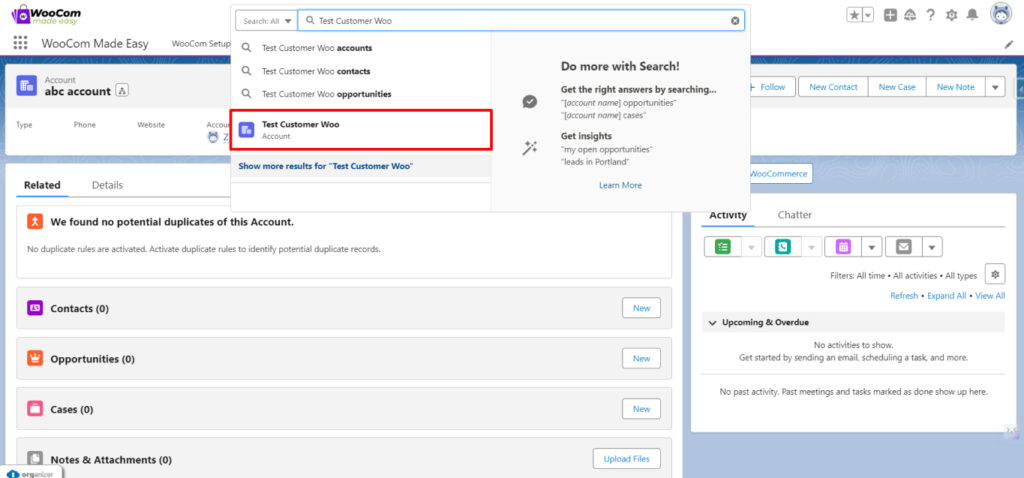
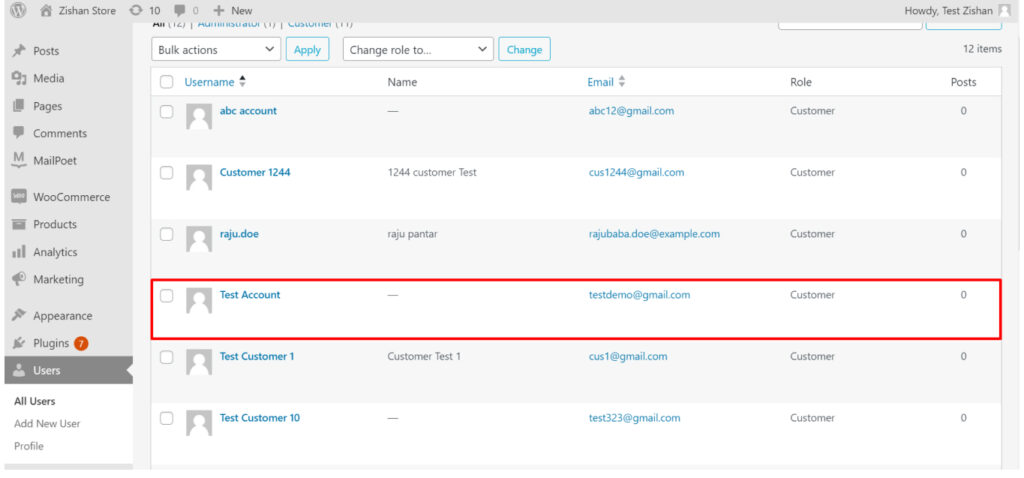
Step 25: To Sync your records in real-time, you need to create a record in your WooCommerce Store (we are creating a customer in this case).
Step 26: Now go to your Salesforce org and search for the same customer, you will find the customer is now present in your Salesforce org.
Salesforce to WooCommerce Sync
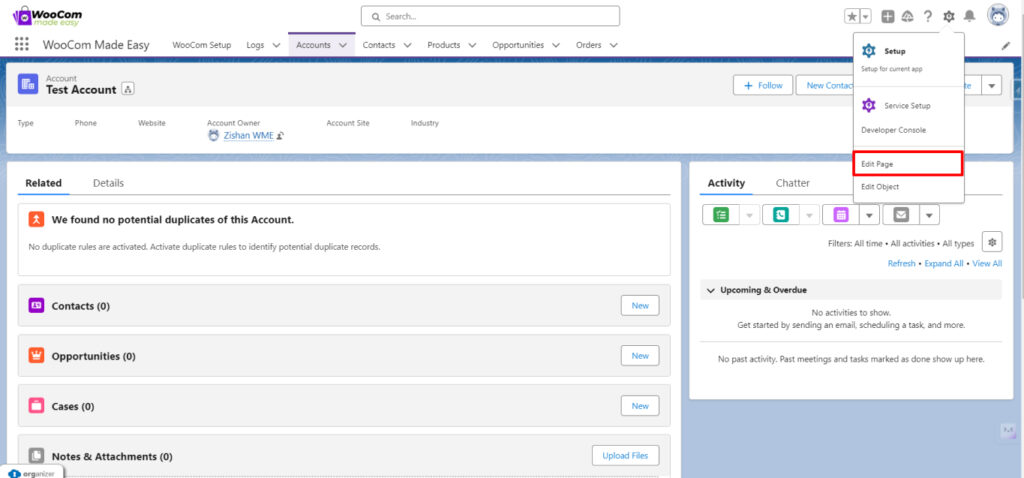
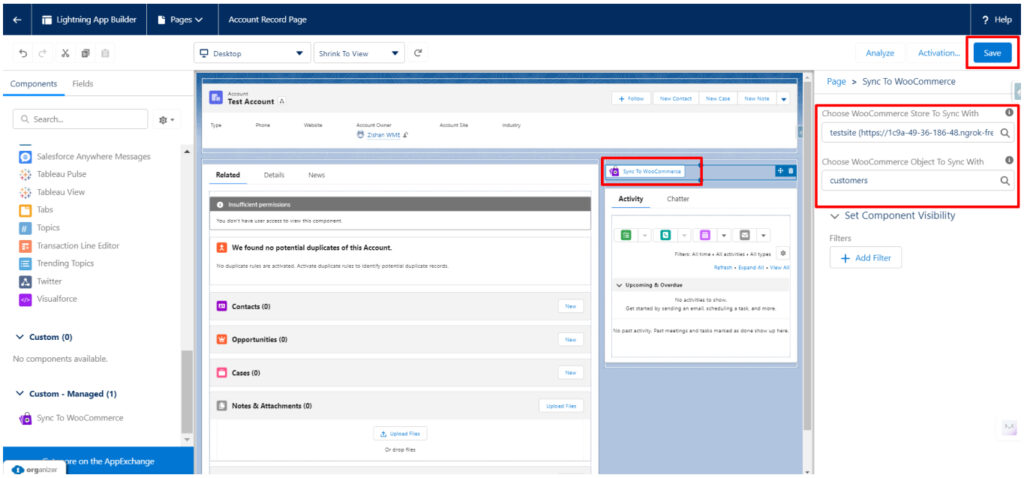
Step 27 : Go to the Edit Page option to sync your Record from Salesforce to WooCommerce Store by clicking the gear icon on the top right corner of the screen.
Step 28 : Drag the custom button i.e. “Sync to WooCommerce” and put it on the page.
Step 29: Configure the Button by selecting the Store and Object you want to sync with and save settings.
Step 30: Now Press the button and you will see the record is Successfully synced with the WooCommerce.
Step 31 : Now check for the record in your WooCommerce Store.
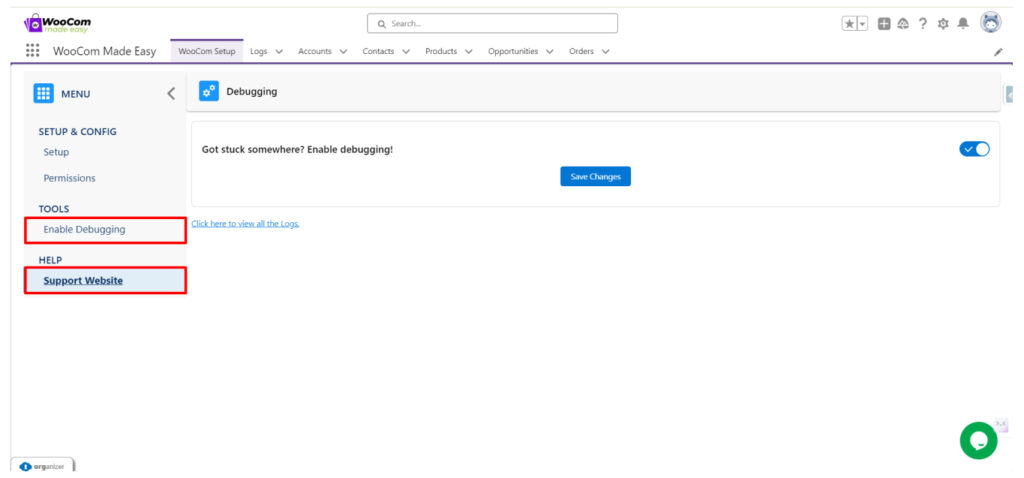
Debugging and Logs
Step 32 : You can enable debugging by clicking on the button “Enable Debugging” from the setup page by turning on the toggle button. You can view the Logs by clicking on the link.
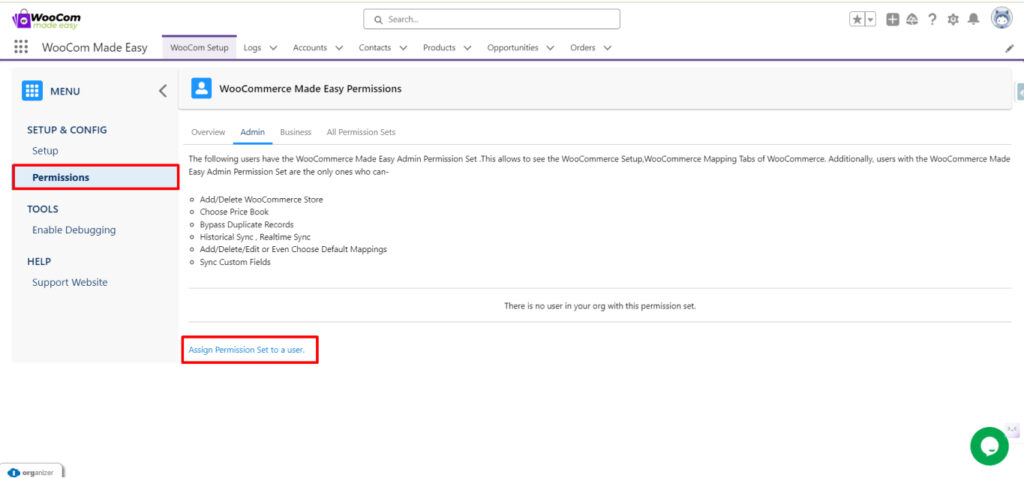
Permissions
Step 32 : You can also view and assign permission sets to a user from permission settings on the WooCom setup page.
Need Assistance with WooCom
Made Easy Implementation?